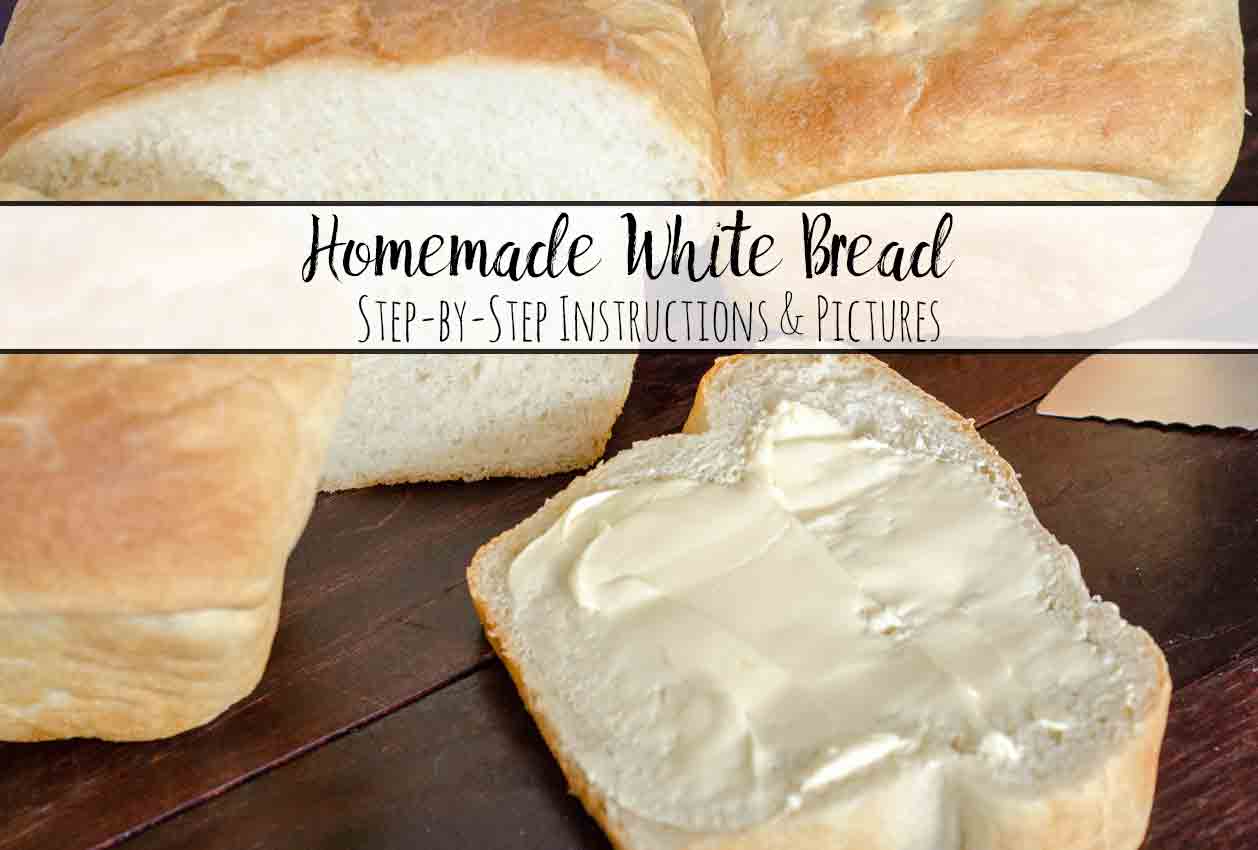
I love bread. Love as in “I could devour an entire loaf with butter in a couple of hours” love. So it’s no surprise that I have a homemade white bread recipe that is delicious.
I tried out a few. Then got tired of trying recipes that seemed the same…but not good enough. So then I started studying bread itself- the ingredients, butter or shortening, what flour (or wheat!), why it rises, etc. With all that new knowledge, I adjusted the best recipe I had found so far and ended up with this wonderful, delightful, it’s-so-much-better-than-store-bought “Traditional Homemade White Bread”. The best part? You can actually use it to make sandwiches!
As always, printable recipe at very bottom of post.

This post is part of an ongoing series titled “Stop Buying, Start Making.” Since the items in the series will include both cooking and cleaning, they will be scattered throughout the website. However, feel free to click on the “Stop Buying, Start Making” category button on the right to see all the posts related to this topic. ~Or~ try the “Stop Buying, Start Making” page for the recipe related items.
Ingredients are fairly standard- bread is bread, it’s just how you put it together! The difference you might note from other bread recipes is the half butter, half shortening. I developed this to get the best of both worlds- both butter and shortening have their own benefits in bread.
Below are the step-by-step pics. They each have captions. And below are the directions….with quite a few additional notes. Skip the additional notes if you’re already familiar with making bread! (The additional notes are in teal and not included in the printable PDF).


Directions (with additional notes):
1. Mise en place. In mixer bowl, dissolve yeast & sugar in water. Let sit 1-2 minutes (optional). Additional notes: I let sit because I’m usually finishing prepping. And I like knowing the yeast is good!
2. Add butter and shortening. Add 4 cups of flour. Using paddle (not hook), mix on speed 2 for 1 minutes.
3. Switch to dough hook. Continue on speed 2, adding remaining flour 1/2 C. at a time until dough clings to hook and cleans sides of bowl. Always error on side of too little flour! Note: Your dough should still be slightly “sticky” when you take it out. Do not over-flour. You can always add more flour later in the process.
4. Knead on speed 2 approx. 2 more minutes. Note: If dough starts to “stick” too much to the bottom, add flour a tablespoon at a time or so. After you’ve made bread a couple of times, the consistency will be automatic.
5. Lightly grease a large bowl. Remove dough from mixer, knead once or twice. Note: Final few kneads. Process: Start with a rough ball. “Press” down with the ball of your head, pushing forward and stretching the dough a little. Rotate 90 degrees. Fold in half. Press down again. Rotate 90 degrees. Fold in half. Press down again. Repeat.
6. Form into rough round/ball. Place dough in bowl and turn over to coat with grease. Cover with damp cloth and let rise in a warm place until doubled, approx. 1 hour. (I heat oven for about a minute to warm up and use oven).
7. Punch down dough. Turn out onto lightly floured surface and knead a few times. Tuck the dough into a “round” to give it a smooth, tight top. Let stand 10 minutes. Note: This step is actually important. I didn’t believe it myself until I tried. The 10 minutes resting is needed.
8. Shape into two loaves (do NOT roll out and wrap…just shape it). Place each loaf in a lightly greased bread pan. (I prefer stoneware pan, but a regular metal one works.) Cover with damp cloth and let rise in a warm place until doubled, approx. 30 minutes. For sandwich bread, I let it rise a little less; for light, fluffy bread, I let it a rise a little more.
9. Pre-heat oven to 425 degrees. Place small pan to the side in the oven.
10. Turn down oven to 375 degrees. Pour approx. 2 cups water into preheated pan (for steam). Bake bread about 30 min. or until top is golden and loaf sounds hollow when tapped. (Cover with foil after 15 min. to prevent over browning, if needed).
11. Remove from oven. Let sit in pans 5 minutes, then turn out onto cooling rack.
Perfect Traditional Homemade White Bread (& it works for sandwiches!)
Ingredients
- 4 & 1/2 tsp yeast
- 3 Tbsp granulated white sugar
- 2 & 1/2 C warm water 110-115 degrees
- 2 Tbsp. unsalted butter
- 2 Tbsp. shortening butter-flavored
- 1 Tbsp. salt
- 6 & 1/2 C. bread flour
Instructions
- Mise en place. In mixer bowl, dissolve yeast & sugar in water. Let sit 1-2 minutes (optional). Additional notes: I let sit because I’m usually finishing prepping. And I like knowing the yeast is good!
- Add butter and shortening. Add 4 cups of flour. Using paddle (not hook), mix on speed 2 for 1 minutes.
- Switch to dough hook. Continue on speed 2, adding remaining flour 1/2 C. at a time until dough clings to hook and cleans sides of bowl. Always error on side of too little flour! Note: Your dough should still be slightly “sticky” when you take it out. Do not over-flour. You can always add more flour later in the process.
- Knead on speed 2 approx. 2 more minutes. Note: If dough starts to “stick” too much to the bottom, add flour a tablespoon at a time or so. After you’ve made bread a couple of times, the consistency will be automatic.
- Lightly grease a large bowl. Remove dough from mixer, knead once or twice. Note: Final few kneads. Process: Start with a rough ball. “Press” down with the ball of your head, pushing forward and stretching the dough a little. Rotate 90 degrees. Fold in half. Press down again. Rotate 90 degrees. Fold in half. Press down again. Repeat.
- Form into rough round/ball. Place dough in bowl and turn over to coat with grease. Cover with damp cloth and let rise in a warm place until doubled, approx. 1 hour. (I heat oven for about a minute to warm up and use oven).
- Punch down dough. Turn out onto lightly floured surface and knead a few times. Tuck the dough into a “round” to give it a smooth, tight top. Let stand 10 minutes. Note: This step is actually important. I didn’t believe it myself until I tried. The 10 minutes resting is needed.
- Shape into two loaves (do NOT roll out and wrap…just shape it). Place each loaf in a lightly greased bread pan. (I prefer stoneware pan, but a regular metal one works.) Cover with damp cloth and let rise in a warm place until doubled, approx. 30 minutes. For sandwich bread, I let it rise a little less; for light, fluffy bread, I let it a rise a little more.
- Pre-heat oven to 425 degrees. Place small pan to the side in the oven.
- Turn down oven to 375 degrees. Pour approx. 2 cups water into preheated pan (for steam). Bake bread about 30 min. or until top is golden and loaf sounds hollow when tapped. (Cover with foil after 15 min. to prevent over browning, if needed).
- Remove from oven. Let sit in pans 5 minutes, then turn out onto cooling rack.


This looks so amazing! I can’t wait to try it. Pinned and tweeted! Thanks for being a part of our party. I hope to see you, tonight at 7 pm. Lou Lou Girls
I love the white bread recipe as well as the whole wheat one and have been using for about 6 months now. Thank you for your post-I love them! These recipes are awesome and my husband loves the bread as well as the beautiful smell of baking bread in our home. Thank you, thank you!
Glad you’re enjoying the bread! I tested a LOT of recipes before I developed this one. So glad someone else is getting to enjoy it. thanks for the comment and the 5-star rating.